


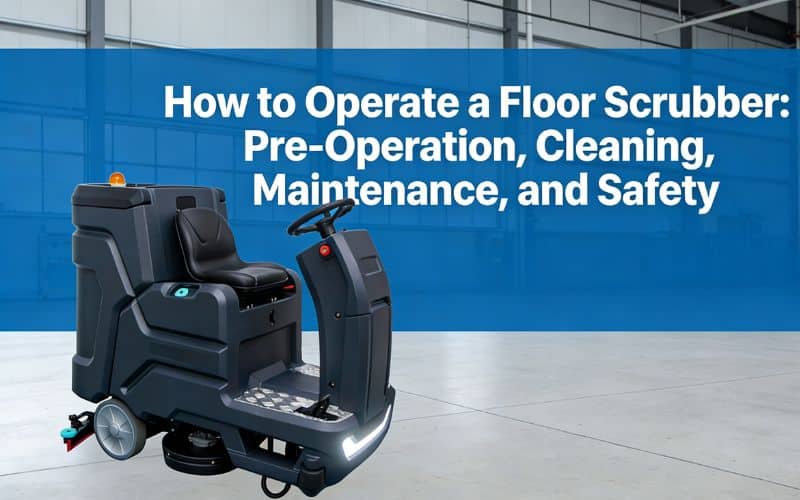
In all commercial and industrial environments, from warehouses and retail centers to healthcare and educational facilities, the upkeep of cleanliness and hygiene is non-negotiable. Automatic floor scrubbers represent the latest tools of the trade. Compared to manual mopping, they save significant time and provide a superior, more thorough clean. However, to optimize effectiveness and safety for both operators and pedestrians, and to prolong the lifespan of the equipment, a floor scrubber must be properly trained and operated. Incorrect use of a floor scrubber poses a high risk of substandard floor cleaning, floor damage, and workplace accidents.
This comprehensive guide will walk you through the essential steps for operating a floor scrubber. We will cover everything you need to know, broken down into clear, manageable sections:
- Pre-Operation: Preparing the machine for use with thorough inspections.
- Maneuvering and Cleaning: The fundamentals of moving and controlling the scrubber.
- Cleaning Techniques: Best practices for achieving spotless floors.
- Maintenance and Troubleshooting: Keeping your machine in top condition.
- Safety Tips: Critical advice for preventing accidents.
- FAQs: Answering your most common questions.
By following these instructions, you will be equipped to operate a floor scrubber safely, efficiently, and with professional results.
How to Operate a Floor Scrubber: Pre-Operation
Before you begin cleaning, a series of pre-operational checks is necessary to ensure the machine is safe and ready to perform. This process involves a detailed inspection of the scrubber’s key components and a safe start-up procedure. These steps are vital for preventing unexpected breakdowns and ensuring safety during use.
You should perform two main inspections: a visual check with the machine turned off and an operational check with the power on. If any inspection reveals a defect or a need for repair, the machine must be taken out of service immediately and reported to a supervisor. Do not operate a scrubber that is not in perfect working order.
Pre-Operational Inspection
A thorough visual inspection is the first line of defense against operational failures. It allows you to identify potential issues before they become serious problems. This process varies slightly depending on whether your machine is battery-powered or corded, but a general checklist applies to all models.
General Checklist
With the floor scrubber powered off, carefully inspect the following components. Look for any signs of wear, damage, or malfunction that could compromise safety or performance.
- Solution and Recovery Tanks: Check that both tanks are empty and clean before starting. Look for any cracks or leaks.
- Squeegee Assembly: Inspect the front and rear squeegee blades for tears, warping, or excessive wear. A damaged squeegee will not recover water effectively, leaving wet streaks on the floor. Ensure it is properly attached and can move freely.
- Brushes or Pads: Examine the condition of the scrub brushes or pads. Bristles should be intact, and pads should not be worn down or clogged with debris. Confirm the correct type of brush or pad is installed for the floor surface you intend to clean.
- Hoses and Gaskets: Check all hoses for cracks, leaks, or blockages. Ensure all gaskets and seals around the tanks and filters are in good condition to prevent leaks and maintain proper suction.
- Machine Body and Wheels: Inspect the machine’s housing for any physical damage. Check the wheels for wear, ensuring they rotate smoothly and are free of embedded debris.
- Safety Decals and Operator Manual: Confirm all safety warnings and instructional labels are in place and legible. The operator’s manual should be stored on the machine and be complete.
- Operator Compartment: Make sure the standing platform or operator seat is clean, dry, and free of any objects or grease that could cause a slip.
Battery-Powered Scrubbers
For battery-operated models, additional checks are required to ensure the power system is safe and functional. Always wear appropriate personal protective equipment (PPE), including rubber gloves and eye protection, when inspecting batteries.
- Battery Charge Level: Check the battery gauge to ensure there is sufficient charge to complete the intended cleaning task. Starting a job with a low battery can leave you stranded.
- Battery Connections: Inspect the battery cables and connectors. Look for any signs of corrosion, fraying, or loose connections. Ensure connectors are securely fastened.
- Electrolyte Levels (for wet-cell batteries): If your scrubber uses wet-cell batteries, check the electrolyte (water) levels. If low, top them off with distilled water only after the batteries have been fully charged.
- Battery Compartment: Ensure the battery is properly secured within its compartment and that any restraining brackets are tight.
Cable-Driven Scrubbers
For corded or cable-driven scrubbers, the inspection focuses on the power cord and its connections to prevent electrical hazards.
- Power Cord Condition: Carefully inspect the entire length of the power cord for any cuts, abrasions, or exposed wires. A damaged cord is a serious shock and fire hazard and must be replaced immediately.
- Plug and Strain Relief: Check the plug for bent or damaged prongs. Ensure the strain relief, where the cord enters the machine, is intact to prevent the cord from being pulled out of its connections.
- GFCI Protection: Ensure the machine is plugged into a Ground Fault Circuit Interrupter (GFCI) outlet, or that the plug itself has GFCI protection, to safeguard against electrical shock, especially in wet environments.
Mounting the Floor Scrubber
Safely getting onto a walk-behind or ride-on scrubber is an important step that is often overlooked. Slips and falls can occur if not done with care. Always maintain three points of contact (two feet and one hand, or one foot and two hands) when mounting or dismounting.
- Ensure a Firm Footing: Check that your shoes are dry and free of grease. Make sure the step or platform on the machine is also clean and dry.
- Use Handholds: Use designated hand grips or handles to steady yourself. Do not use the steering wheel or control levers for support, as they can move unexpectedly, causing you to lose your balance.
- Position Yourself Correctly: Step onto the machine deliberately. For ride-on models, sit down securely in the operator’s seat. For walk-behind models, position yourself comfortably behind the controls. Adjust the handle to a height that allows you to stand upright without straining your back or wrists.
Starting the Floor Scrubber
After the visual inspection is complete and you are safely positioned, you can start the machine. This step also includes a final operational check to confirm all systems are working correctly before you begin cleaning.
- Initial Steps: For battery models, turn the key or press the power button. For corded models, plug the machine into a suitable outlet. Listen for any unusual noises as the machine powers on.
- Operational Check: With the machine stationary and the parking brake engaged (if applicable), test all functions.
- Controls: Test the forward and reverse controls to ensure they respond correctly.
- Brush/Pad Motor: Engage the brush deck to confirm the brushes or pads spin properly.
- Vacuum Motor: Turn on the vacuum motor and listen for strong, consistent suction.
- Solution Flow: Test the water/solution release system to ensure it flows evenly.
- Safety Features: Check that the horn, lights, and any emergency stop buttons are working.
How to Operate a Floor Scrubber: Maneuvering and Cleaning
Operating a floor scrubber requires more than just walking behind it or steering it like a car. Proper maneuvering is key to effective cleaning and preventing accidents. The unique weight distribution and rear-steering characteristics of some models demand careful attention from the operator.
Understanding how to navigate different environments, control your speed, and handle the machine safely is essential. This section covers the fundamental skills for moving the scrubber from the moment you start until you park it.
Visibility and Path Planning
Clear visibility is paramount when operating any large equipment. Blocked views can easily lead to collisions with racking, inventory, or pedestrians. Planning your cleaning path in advance helps ensure a safe and efficient job.
- Ensuring Clear Visibility: Always look in the direction you are traveling. Before you start moving, scan the entire area—front, back, and sides. Be aware that the machine’s body can create significant blind spots.
- Plan Your Route: Mentally map out your cleaning path before you start. Begin at the point farthest from your starting position and work your way back. This prevents you from having to travel over freshly cleaned, wet floors.
- Use Safety Aids: Utilize mirrors if the machine is equipped with them. In congested or noisy areas, use a spotter to help guide you and watch for pedestrians.
- Navigating Blind Spots: Slow down and use the horn when approaching intersections, doorways, or aisle corners where your vision is obstructed. This alerts others to your presence.
- Lighting: Use the machine’s headlights in dimly lit areas or during evening hours to improve your visibility and make the machine more visible to others. When moving between areas with different light levels, like from a bright warehouse into a darker storage room, pause for a moment to let your eyes adjust.
Starting to Clean
Once your path is clear and you have planned your route, you can begin the cleaning process. A smooth start sets the tone for a safe and productive session.
- Initial Movement: Lower the scrub deck and squeegee. Select the forward direction and gently press the accelerator or engage the drive lever. Start moving slowly to get a feel for the machine’s response.
- Straight-Line Cleaning: In open areas, operate the machine in long, straight, overlapping passes. Overlap each pass by a few inches to ensure no streaks are left behind. This method is the most efficient and provides the best results.
Operating at Speed
Controlling your speed is crucial for both safety and cleaning quality. Moving too fast can lead to accidents and will not give the cleaning solution and brushes enough time to work effectively.
- Safe Cleaning Practices: Always operate the scrubber at a speed that allows you to stop quickly and safely if a hazard arises. The appropriate speed will depend on the environment—slower in congested areas and slightly faster in wide-open spaces.
- Wet Floors: Reduce your speed significantly on wet or freshly scrubbed floors to prevent skidding.
- Obstacle Awareness: Constantly scan the path ahead for obstacles, spills, or people. Never assume your path will remain clear.
- Turning: Slow down before making a turn. The tail of a ride-on scrubber can swing out widely, creating a potential collision hazard. Take turns smoothly and avoid sharp, sudden movements that could destabilize the machine.
Changing Direction
Changing direction, especially reversing, requires extra caution due to reduced visibility and the machine’s different handling characteristics.
- Reversing Safely: Before backing up, stop completely and look over your shoulder to ensure the path is clear. Do not rely solely on mirrors.
- Use Alerts: Sound the horn or use the machine’s back-up alarm (if equipped) to warn anyone who might be in your blind spot.
- Controlled Movement: Reverse slowly and be prepared to stop instantly. Because the steering wheels are often at the rear, the machine will pivot differently from a car. Practice this in an open area to become familiar with its movement.
Navigating Inclines
Operating a floor scrubber on ramps or inclines presents a significant risk of tipovers or losing control. Special procedures must be followed.
- Handling Grades: When driving up or down a ramp, always travel straight up or straight down. Never attempt to turn on an incline, as this can easily make the machine unstable and tip over.
- Direction of Travel: When traveling up a ramp, the operator should be on the machine’s up side. When traveling down a ramp, the operator should also be on the upside. This means driving forward up the ramp and in reverse down the ramp. This positioning helps maintain control and stability. Always check your manufacturer’s manual for specific instructions on grade limitations.
Stopping and Parking
Properly stopping and parking the scrubber prevents accidental movement and ensures it is ready for the next user. A machine is considered “unattended” if the operator is more than 25 feet away or out of sight.
- Proper Shutdown: Bring the machine to a complete stop in a designated parking area. Avoid blocking aisles, exits, or fire equipment.
- Secure the Machine: Raise the scrub deck and squeegee. Turn off all functions, including the brush motor, vacuum, and solution flow.
- Engage Park Brake: Set the parking brake firmly. For corded models, unplug the cord and wrap it securely on its designated hooks.
- Power Down: Turn the key to the “off” position and remove it. If parked on a slight incline, place wheel chocks behind the wheels as an extra precaution.
How to Operate a Floor Scrubber: Cleaning Techniques
Effective cleaning is a science. It involves more than just driving the machine; it requires using the right techniques, solutions, and machine settings for the specific job. Mastering these techniques ensures you achieve a consistent, high-quality clean while protecting your floor surfaces.
This section focuses on the practical application of the scrubber’s features, from preparing the cleaning solution to tackling challenging areas and navigating around obstacles.
Preparing the Cleaning Solution
Using the correct cleaning solution at the right dilution is fundamental to good results. The wrong chemical can damage floors, while an incorrect mixture can leave residue or fail to clean effectively.
- Mixing and Filling: Always refer to the chemical manufacturer’s instructions for the proper dilution ratio. Using too much chemical is wasteful, can create excessive foam that damages the vacuum motor, and may leave a slippery residue. Mix the solution in a separate bucket before pouring it into the scrubber’s solution tank. This ensures it is properly mixed and prevents foaming inside the tank. Use a debris filter or screen when filling to prevent particles from clogging the solution lines or spray jets.
Approaching the Cleaning Area
Properly positioning the scrubber before you start each pass is crucial for achieving uniform results and avoiding missed spots, especially along walls and edges.
- Positioning the Scrubber: When starting a new section, align the machine so the edge of the scrub path slightly overlaps the previously cleaned area. For cleaning along walls, position the machine so the side of the scrub deck gets as close to the edge as possible without the machine itself hitting the wall. Most scrubbers have a slightly wider scrub path on one side; use this “edge scrubbing” side for your wall passes.
Using the Brushes and Squeegee
The scrub deck and squeegee are the heart of the machine. Understanding how to use them correctly is key to lifting dirt and leaving a dry floor.
- Brush and Squeegee Operation: Before you start moving, lower the scrub deck to the floor. Begin moving forward, and then turn on the water flow and the brushes simultaneously. Adjust the brush pressure and solution flow rate based on the soil level. For heavily soiled areas, you may need higher brush pressure and more solution. As the machine moves, the rear squeegee will collect the dirty water. Ensure the squeegee is making even contact with the floor across its entire length. If it leaves streaks of water, it may need to be adjusted, cleaned, or replaced.
Cleaning High-Traffic Areas
Areas like entrances, main aisles, and production zones accumulate more dirt and require special attention. A standard single pass may not be enough to lift heavy soiling.
- Techniques for Heavy Use Areas: For exceptionally dirty floors, use the “double-scrubbing” method. On the first pass, operate the machine with the scrub deck down and the solution flowing, but keep the squeegee raised. This allows the cleaning solution and brush agitation to sit on the floor and break down the grime for a longer period. After the first pass, make a second pass over the same area, this time with the squeegee down and the solution turned off, to scrub again and recover all the dirty water.
Handling Obstacles
Commercial and industrial spaces are rarely empty, open fields. Navigating around furniture, shelving, and other fixtures requires skill and precision.
- Navigating Around Furniture and Fixtures: Reduce your speed when approaching any obstacle. Maneuver slowly and carefully around the object, getting as close as you can to clean the surrounding floor without making contact. Use the machine’s outside turning radius to your advantage. It may be necessary to make a multi-point turn to clean tight spots effectively. After cleaning around obstacles, you will likely need to perform some manual touch-up cleaning in corners and tight spaces where the machine could not reach.
How to Operate a Floor Scrubber: Maintenance and Troubleshooting
Proper maintenance is the key to a floor scrubber’s longevity, performance, and safety. A well-maintained machine runs efficiently and is less likely to break down unexpectedly. This section covers essential daily and scheduled maintenance tasks, as well as troubleshooting common problems.
Following a consistent maintenance routine prevents costly repairs and ensures your equipment is always ready for the next job.
Daily Maintenance
After every use, a series of cleaning and inspection tasks must be performed. This daily routine takes only a few minutes but has a massive impact on the machine’s reliability.
- Post-Operation Cleaning:
- Empty and Rinse Tanks: Drain both the solution and recovery tanks completely. Use a hose to thoroughly rinse out the recovery tank to remove all dirt, sludge, and debris. Leaving dirty water in the tank can cause foul odors and clogs.
- Clean Squeegee Assembly: Wipe down the squeegee blades with a clean cloth. Remove any debris caught in the assembly. This ensures it will create a proper seal with the floor on the next use.
- Inspect and Clean Brushes/Pads: Remove and inspect the brushes or pads. Clean off any strings, plastic wrap, or debris that has become entangled in them.
- Wipe Down the Machine: Use a damp cloth to wipe down the exterior of the machine, removing any dirt or chemical residue.
- Charge Batteries: For battery-powered models, plug the machine into its charger. It’s best practice to fully recharge the batteries after each use.
Scheduled Maintenance
In addition to daily care, periodic maintenance checks should be performed weekly or monthly to address components that don’t require daily attention but are critical to long-term operation.
- Preventive Care:
- Check Hoses and Gaskets: Perform a more detailed inspection of all hoses for wear and ensure all connections are tight. Check the gaskets on the recovery tank lid for cracks or compression that could cause suction loss.
- Inspect Squeegee Blades: Examine them for signs of wear. Most blades have four usable edges. Rotate the blades when one edge becomes worn to extend their life.
- Clean Filters: Check and clean the solution line filter and any floating shut-off filters in the recovery tank. Clogged filters can restrict water flow and reduce vacuum performance.
- Check Drive System: For ride-on models, check tire pressure and condition. For walk-behind models, inspect the drive wheels for wear.
Troubleshooting Common Issues
Even with proper maintenance, you may occasionally encounter problems. Knowing how to diagnose and fix simple issues can save you time and prevent the need for a service call.
Battery Problems
Battery issues are a common source of trouble for cordless scrubbers. Always disconnect the batteries before attempting any repairs.
- Machine won’t start: If the machine shows no power, first check that the battery is properly connected and fully charged. Look for corrosion on the terminals that may be preventing a good connection.
- Short Run Time: If the batteries are not holding a charge for as long as they used to, check the water levels (for wet-cell types). Consistently undercharging or overcharging can also reduce battery life. If the batteries are old, they may simply need to be replaced.
Brush and Squeegee Issues
Problems with the cleaning components directly affect performance, resulting in poor floor results.
- Poor Cleaning Results: If the machine isn’t cleaning effectively, check the condition of the brushes or pads. They may be worn out or the wrong type for the soil level. Also, ensure the cleaning solution is mixed correctly, and the flow rate is adequate.
- Floors Left Wet or Streaky: This is almost always a squeegee issue. Check that the squeegee is properly aligned and making even contact with the floor. Inspect the blades for nicks or wear. Clear any clogs in the squeegee assembly or the vacuum hose leading to the recovery tank. Finally, ensure the vacuum motor is running, and the recovery tank lid is sealed tightly.
Safety Tips for Operating a Floor Scrubber
Safety should always be the top priority when operating any piece of heavy machinery. While floor scrubbers are generally safe, potential hazards exist, including slips, falls, collisions, and electrical shocks. Adhering to strict safety protocols protects the operator, pedestrians, and the property.
This section outlines essential safety practices, from wearing the right protective gear to being aware of your surroundings.
Personal Protective Equipment (PPE)
Wearing the correct PPE is your first line of defense against injury. It protects you from common hazards associated with floor cleaning.
- What to Wear:
- Slip-Resistant Footwear: This is the most critical piece of PPE. You will be working on wet, potentially slippery surfaces. Sturdy, closed-toe shoes with a certified slip-resistant sole are mandatory.
- Gloves: When handling cleaning chemicals or performing maintenance, wear chemical-resistant gloves to protect your skin from irritation or burns.
- Eye Protection: Safety glasses or goggles should be worn, especially when mixing chemicals or cleaning tanks, to protect your eyes from splashes.
Avoiding Hazards
Situational awareness is key to preventing accidents. Most incidents are caused by a lack of attention to the environment.
- Common Risks and Prevention:
- Slips and Falls: The most common hazard is slipping on a wet floor. Always use “Wet Floor” signs to block off the area you are cleaning. Walk carefully and wear appropriate footwear.
- Collisions: Be constantly aware of your surroundings. Watch for pedestrians, other equipment, and stationary objects. Use the horn at intersections and blind corners. Never operate the machine faster than a walking pace.
- Electrical Shock (Corded Models): Always inspect the power cord for damage before use. Never operate a machine with a frayed or cut cord. Plug into GFCI-protected outlets and avoid running over the cord with the machine. Keep the cord over your shoulder or behind you to keep it out of the scrubber’s path.
- Chemical Handling: Read the Safety Data Sheet (SDS) for any chemical you use. Understand its risks and handling procedures. Never mix different cleaning chemicals together, as this can create hazardous fumes.
Floor Scrubber Operation FAQs
How often should floor scrubbers be maintained?
Maintenance should be performed in two stages. Daily maintenance, including emptying and cleaning tanks, wiping down the machine, and cleaning the squeegee, should be done after every use. Scheduled preventive maintenance, such as checking filters, hoses, and rotating squeegee blades, should be performed weekly or monthly, depending on use frequency and the manufacturer’s recommendations.
What cleaning solutions should be used?
The appropriate cleaning solution depends on your floor type and the kind of dirt you are removing. Use a pH-neutral cleaner for general daily cleaning on most surfaces. For heavy grease or oil, an alkaline degreaser may be needed. For mineral deposits or hard-water stains, a mild acidic cleaner may be required. Always consult your flooring manufacturer and the chemical supplier to ensure compatibility.
Can floor scrubbers be used on uneven surfaces?
Most floor scrubbers are designed for use on smooth, relatively flat surfaces like concrete, vinyl, or tile. While some models have floating brush decks that can adapt to minor irregularities, they are not intended for truly uneven floors. Using a scrubber on rough or very uneven surfaces can result in poor cleaning, damage to the squeegee and brushes, and potential instability of the machine.
What safety precautions should operators follow?
Key safety precautions include: wearing slip-resistant shoes and other appropriate PPE; using “Wet Floor” signs to warn others; inspecting the machine before each use, especially the power cord on corded models; operating at a safe, controllable speed; and being constantly aware of your surroundings to avoid collisions with people or objects. Always look in the direction of travel.
How do you troubleshoot common issues?
For poor cleaning, check your brushes/pads and cleaning solution. If the floor is left wet, inspect the squeegee for wear and clogs, and ensure the vacuum system is functioning correctly. If a battery-powered machine won’t start or has a short run time, check the battery charge, connections, and overall health. Always refer to the operator’s manual for a detailed troubleshooting guide.
How often should I replace the squeegee blades on my floor scrubber?
Squeegee blades should be replaced when they show visible signs of wear, such as cracks, tears, or uneven edges, or when they no longer provide effective water pickup. Regular inspection after each use can help determine when replacement is necessary.
Can I use any type of soap or detergent in the solution tank?
No, you should only use cleaning solutions recommended by the manufacturer. Using the wrong type of soap or detergent can damage the machine, leave residue on the floor, or void the warranty. Always check the operator’s manual for approved cleaning agents.
Why is my machine leaving streaks of water behind it?
Streaks of water can be caused by worn or damaged squeegee blades, clogs in the vacuum system, or improper squeegee adjustment. Inspect the squeegee for wear, clean any debris, and ensure it is properly aligned with the floor.
How do I know whether to use a pad or a brush for my floor type?
Pads are typically used for smooth, polished floors, while brushes are better suited for textured or uneven surfaces. Consult the operator’s manual or the manufacturer’s recommendations to determine the best option for your specific floor type and cleaning needs.
What should I do if the vacuum motor stops picking up water?
If the vacuum motor stops picking up water, check for clogs in the vacuum hose or filters, ensure the recovery tank is not full, and inspect the squeegee for proper alignment and wear. If the issue persists, consult the operator’s manual or contact a service technician.
How long does a typical battery charge last during active scrubbing?
The runtime of a battery-powered floor scrubber depends on the model and battery capacity. On average, a fully charged battery lasts between 1 to 3 hours of active scrubbing. Always ensure the battery is fully charged before use and follow proper charging practices to maximize battery life.
Conclusion
Mastering the operation of an automatic floor scrubber is a valuable skill that contributes directly to a cleaner, safer, and more efficient facility. By following the detailed guidelines in this post, you are now equipped to handle these powerful machines with confidence and professionalism. From the critical pre-operational inspections and safe maneuvering techniques to advanced cleaning strategies and diligent maintenance, each step plays a vital role in achieving optimal results.
Remember that consistent practice and a commitment to safety are the cornerstones of expert operation. Always prioritize thorough inspections before you begin, remain aware of your surroundings while you work, and perform post-operational cleaning after every use. By integrating these practices into your routine, you will not only ensure a consistently high standard of cleanliness but also maximize your equipment’s lifespan and foster a safer environment for everyone. Keep this guide as a reference, and you will be well on your way to becoming a floor care expert.